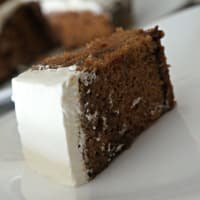
Cold Chocolate Cake
Desserts from Italy
Bicolour croissant
Bicolour croissant
ready in
2 hours
difficulty
daily requirement
100% Fat
100% Protein
100% Carbohydrates
translated by
Italian
with 

Fluffy croissants for a great breakfast

Let's start by putting the milk in the bowl (it would be preferable at around 29 ° C), sugar, salt and vanilla.

Add half the flour.

On the flour we crumble the yeast and start the machine.

As the dough is formed we add the remaining flour.

We do not have to work the dough for a long time, just wrap around the hook and get off the walls.

From the total amount of the mixture, weigh at least 210g. (I have weighed less than this amount and I hurt because after I had to pay for the drafting of the sheet)

Let's put the weighed amount in the machine together with water and cocoa.

Let's knead so that the cocoa is absorbed by the dough. Given the small amount, this operation could be a bit difficult in the planetarium.

In the case, let's not go to the good old-fashioned old-fashioned olive oil.

We make two packets with pastes, using baking paper or food film.

We try to give a more or less rectangular shape and put it in the fridge for at least two hours. I prefer to keep them in the fridge for a whole night.

Once the dough is cold and rested, we can start the slicing. We spread the pasta in rectangular shape.

The butter should be around 16 ° -18 ° and then remove it from the fridge at least two hours before using it. We also spread rectangularly between two sheets of baking paper.

Width in size should be more or less the size of the sheet previously laid while the height is more or less one third of it.

Put the butter in the center of the leaf.

Let's fold the free sheets of the puff over the butter by bringing them together.

We rotate the leaf to us and put the rolling pin in the direction of the length.

Finally, we fold three to the leaf.

Reform the package and let it rest in the fridge for about forty minutes.

We have to repeat the folding process twice more, always giving a bend at three each step and respecting the resting time in the fridge.

The three folds will eventually give us a total of 27 sheets of leaf, which will suffice for this type of recipe ...

Even after the last fold we have to wait for the rest in the fridge, but as we will lay the thin sheet thin enough, we increase the time spent in the fridge for at least an hour and a half.

If we do not succeed right now because the leaf becomes too nervous, nothing scary. Let's boil, then let's rest the puff for ten minutes and start rolling.

If the outside temperature is too high we put it in the fridge again quietly.

We also put the cocoa leaf in the same size as the first one.

We overlap the cocoa leaf with the white cocoa and mix well with each other, passing over the rolling pin.

It's time to get out of shape. Obviously, using a cutaway guide is by no means indispensable.

With a wheel or a knife we cut the triangles of pasta that is now bicolor in all respects. Obviously the side clippings we throw them away ..

We can make croissants even with those ... Brutish and irregular but once you get tired there is no more chance

We turn the triangle of pasta with the white side facing upwards, this way we will have a much better graphic result.

Let's make an engraving center of the base a couple of inches long

Let's stretch the edges slightly by cutting and roll to the tip.

When finished rolling we have the croissant on a baking plate with baking paper.

The tip should point down so that the roll does not rupture during the leavening and cooking phase

Let's get up in a warm place and covered with film.

We expect the croissants to double the volume (the one visible in the photo is the result after about two and a half hours of leavening).

However, we do not take this time span as cast gold, but we only note the fact that they have to double volume.

Take one or two yolks and combine the same quantity of milk or cream.

I swallow to soak the yolks with the milk and shake the mixture on the upper surface of each croissant.

The cake is cooked in a preheated oven at 190 ° C. It took me about 15 minutes for the croissants to be golden and fragrant, but as always every oven makes history for itself.

