Apple pie
Desserts from Italy
Glazed biscuits!
Glazed biscuits!
ready in
3 hours
difficulty
daily requirement
100% Fat
100% Protein
100% Carbohydrates
translated by
Italian
with 

Take two days and do them all together, my eyes are bright thinking about the afternoons at home waiting for Christmas. Ah banning melancholy, let's get ready to stick everything!

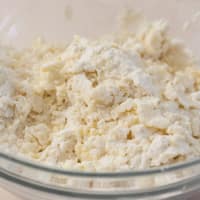
We collect the sifted sugar, flour and baking powder in the bowl and mix everything before adding the soft butter, pull it out a few hours before starting work.

Knead quickly with your hands until you get a lot of crumbs.

At this point we add the eggs and if necessary, add some flour, it always depends on the type of butter, the absorption of the flour we use and the size of the eggs. Knead quickly before moving on the table.

We work quickly so as not to overheat the dough, we form a ball that we wrap in food foil and let it rest in the fridge for at least 30 minutes.

Resist the temptation to add more flour immediately, I tend to tend the dough quite soft because then we will work on the floured surface, not counting the reshuffles with the leftovers, risked that the biscuits have only the taste of flour!

After resting, cut a piece of dough and spread it on the well-floured surface, up to a thickness of 2-3 mm. We cut the cookies that we have on the pan lined with parchment paper.

My advice is to use two pans, so that you can alternate the fires, if you do not have it is not a problem, I suggest you to cool the pan before preparing the next batch.

Bake in a hot oven at 180 degrees for 10 minutes. Once baked we let them cool a few minutes in the pan before placing on a tray. Keep them in an airtight container until you start decorating them and account for half a day.

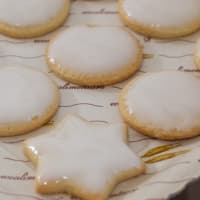
We prepare the base icing, gathering the icing sugar in a bowl and adding the lemon juice until you get a thick consistency, which does not leak too much.

I divided the biscuits by keeping aside those with a colored background and frosting the white ones first. Now, when I was a little mother, she made me glaze the biscuits with the index dipped in the icing and then used to distribute it on the biscuit.

I laid them on the icing for a few moments and then I let the excess run.

If you use the molds, I advise you to use the method of the mother, not to risk breakages and various crumbs in the glaze. Once finished with the white biscuits, we divide the glaze left in the bowls where we will create the various colors.

Let's stop the glaze, while we take care of the colored ones. As you can see, the frosting once dried becomes opaque and at this point we can begin to decorate!

I made the babbetti with snow drawing eyes with two drops of black icing, then the little mouth for some with dots and others designed, always using the toothpick.

Finally to some I gave the headphone and to others I gave the earflaps! The carrot nose is an inevitable triangle.

Then for Christmas lights I drew festoons with black, left to dry and created colored drops. Finally, the reindeer has a bottom of icing and cocoa, a red nose, two small eyes and its sketched horns.

For the starlet, I scored each tip, then I created the two dots of different color on the sides of the first color point and I went on like this until the decoration was completed!

Let it cool well and store in a tin can, until the snack!

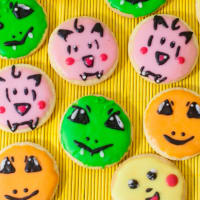
I also made them in Pokémon version! (or rather, I tried)

